Bleed - make accurate for printing/ trimming, standard amount is 3mm.
Printing - Different printers, different bleeds, consult with printer.Slug - for trim marks, registration, printer marks, lost once document is trimmed down.
Primary text frame - each frame will be link from one page to the next, automatic flow of text.
Order of pages for a publication.

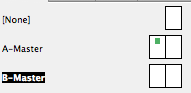
Every thing you apply the master page will be on every other left hand page.

To unlock a master page item - cmd, shift, click and delete.
New master page:

Colour is similar to illustrator.
Transfer swatches. cmyk - small icon next to grey squares in swatch palette.


Create tints by selecting the spot colour, adjusting the tint then dragging the tint colour into the swatch palette.
PHOTOSHOP
1. CMYK colour mode or greyscale
2. 300 dpi for print - resolution
3. Actual size, don't enlarge in indesign as you lower the resolution
4. Decreasing the size of image in indesign, can cause errors best to prepare all items before hand
5. Save as PSD or TIFF file (tiffs don't support transparency)
ILLUSTRATOR
1. CMYK
2. Save as AI, copy and paste
3. You can scale image down in indesign as images are vectorised
Moving art work from illustrator to indesign:
Place
OR
Copy and paste
Grey scale tiff into indesign, you can create a monotone in indesign
Select the image, within the frame, brown frame

Inner circle to chage the colour of the image
Outer circle to change the colour of the back ground

Hold down alt and double click on the image
OR


Double clock on background, change to layer 0
Select magic wand tool, select background and delete, save as photoshop and then open in indesign

Colour separations / positives: Same process for creating positives for screen printing
Window
Output
Separations preview
Research print processes:
Output
Overprint preview
Tracking or trapping
No comments:
Post a Comment